
Rakaposhi base camp trek guides tend to push tours, guided packages, and multi-day itineraries with porters. This one is for independent travellers. Starting from the quiet village of Minapin in Nagar Valley, just off the Karakoram Highway, the trek takes you to the foot of Rakaposhi (7,788 m), the 27th highest mountain in the world and one of the most visually dramatic peaks in the Karakoram.
The route passes through pine and juniper forest, opens into wide alpine meadows at Hapakun, and climbs to the Taghafari ridge. There the full ice wall of Rakaposhi, rising over 5,000 vertical metres from valley floor to summit, comes into view for the first time. No permit required, no guide needed for the main route, and one of the most accessible multi-day treks in northern Pakistan for any confident hiker. Here is everything you need to do it independently.
Rakaposhi Base Camp Trek Overview and Statistics
| Trail Metric | Specification |
| Starting Point | Minapin Village, Nagar Valley (Gilgit-Baltistan) |
| Ending Point / Highest Viewpoint | Tagaphari Campsite (~3,500m) / Diran Peak Ridge (~3,900m) |
| Total Distance (Round Trip) | ~18 km (11.2 miles) |
| Total Elevation Gain | ~1,500 meters (4,921 feet) |
| Maximum Altitude | 3,500m at Base Camp (3,900m if continuing to ridge) |
| Time Required | 2 Days, 1 Night (Recommended) or 1 Brutal Day |
| Technical Difficulty | Moderate (Steep dirt switchbacks, loose scree near the ridge) |
| Permits & Guide Requirements | 100% Independent. No permits, no mandatory guides. |
Is Rakaposhi Base Camp Trek Worth It?
Rakaposhi dominates the skyline for most of the Karakoram Highway between Gilgit and Hunza. You see it for hours from the road, that colossal white wall rising above the valley. And the knowledge that you can walk to the foot of it without a tour operator or an expensive permit is what brings people to Minapin.
What makes this trek stand out from others in northern Pakistan is the combination of accessibility and drama. The trail is well-marked and relatively straightforward, the campsites along the route are manned with food and basic gear for rent, and the scenery at the top: Rakaposhi’s southern ice face, the Minapin Glacier, and Diran Peak (7,266 m) directly across the valley, is at the extreme end of what the Karakoram offers. Unlike Fairy Meadows or Patundas Meadows, which require either a nerve-shredding jeep ride or a guided glacier crossing to reach, Rakaposhi Base Camp is achievable for any hiker in reasonable fitness without specialist knowledge or equipment.
Best Time to trek to Rakaposhi Base Camp
May to October is the main trekking window. The trail is usually clear of snow from late May onwards, and conditions are most reliable from June to September.
June to August
The main season. Trails are fully open, the meadows at Hapakun are green, wildflowers are out, and the days are long. Temperatures are warm at lower elevations but noticeably cool above 3,000 metres. The trade-off is that this window brings the most other trekkers, still a small number by any international standard, but the campsites are busier.
September and October
My preferred window. The crowds thin dramatically, the light is extraordinary in the autumn, and the colours on the lower slopes are exceptional. The trail is still fully accessible in September; October is pushing the edge of the season but remains doable in the first half of the month. Temperatures at the base camp drop to near zero at night in October so pack accordingly. Snow can arrive from mid-October onwards.
May
Shoulder season: the trail is opening up from winter and may have snow on the upper sections, particularly above Hapakun. Doable for experienced trekkers with appropriate gear but less reliable than the main summer window.
How to Get to the Trailhead (Minapin)
Minapin village in Nagar Valley is the starting point for the trek. It sits just off the Karakoram Highway, roughly halfway between Gilgit and Karimabad, around 1.5 hours from Gilgit and about 40 minutes south of Aliabad in Hunza.
Reaching Minapin from Gilgit by Public Transport
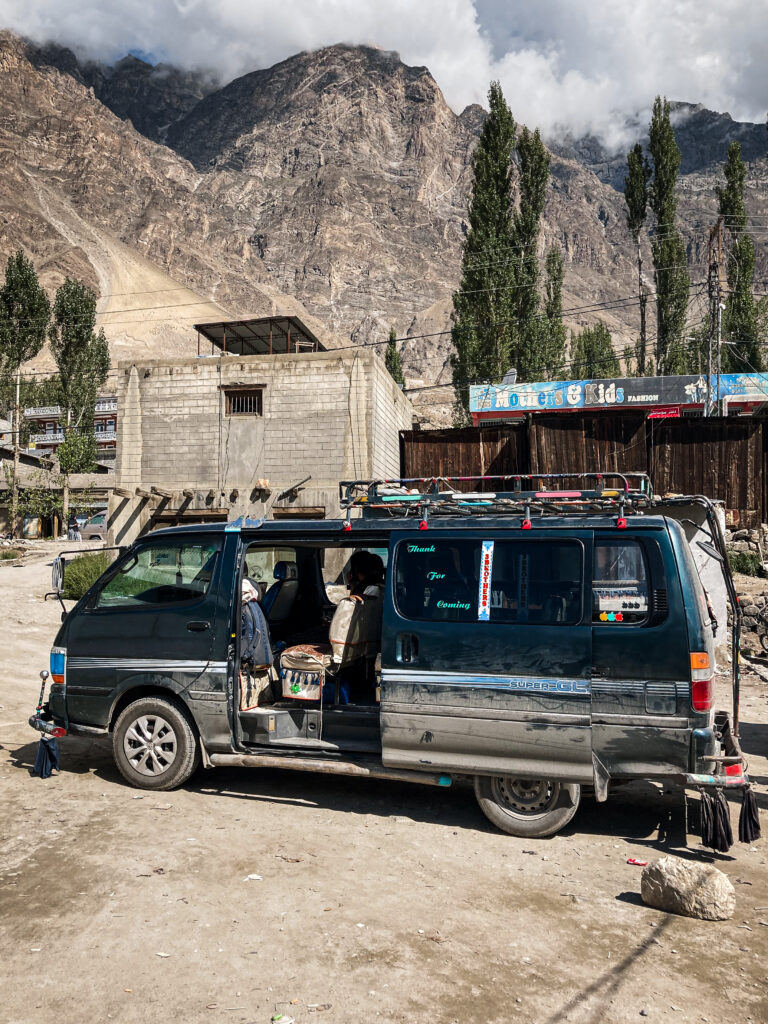
Shared minivans run from Gilgit’s main transport area to Hunza. Take any Hunza-bound vehicle and ask to be dropped at the Minapin/Pissan turnoff on the KKH. The journey takes around 1.5 hours. From the turnoff it’s around 5 km to the trailhead. It’s walkable in around an hour, or hitchhike with a passing local vehicle. There’s enough local traffic that waiting long is unusual.
Reaching Minapin from Hunza by Public Transport
Take any southbound shared minivans/ cars towards Gilgit and ask to be dropped at the Minapin turnoff. The shared minivans should you around 250 PKR (less than 1€). The journey from Karimabad is around 45 minutes. From the turnoff it’s around 5 km to the trailhead. It’s walkable in around an hour, or hitchhike with a passing local vehicle. There’s enough local traffic that waiting long is unusual.
Hitchhiking
Hitchhiking to and from Minapin is entirely feasible and how many independent travellers manage it. Stand at the relevant point on the KKH and flag down anything heading your direction. Locals are helpful and traffic on this stretch of the highway is reliable during daylight hours.
Where to Stay in Minapin Before the Trek
Spending a night in Minapin before the trek is worth doing. It lets you start the trail early the next morning before the heat kicks in, acclimatise slightly to the altitude (Minapin sits at around 2,000 m), and sort any last-minute supplies.
The Osho Thang Hotel is the most consistently recommended guesthouse in Minapin and the choice for most trekkers starting the Rakaposhi route. The owners are knowledgeable about current trail conditions and can help arrange a guide if you want one. Basic rooms, clean, with simple meals available. Prices are modest, around 2,000-3,500 PKR per night for a private room.
Deposit any luggage you don’t need on the trail here. There’s no reason to carry more than a day pack and your camping gear up the mountain.
Do You Need a Guide for Rakaposhi Base Camp?
For the main trail to Rakaposhi Base Camp: Minapin to Hapakun to Taghafari and back – no guide is necessary. The trail is well-marked, consistently used, and straightforward to follow. Both campsites are manned by locals who can point you in the right direction if needed.
For the Diran Base Camp extension, a guide is strongly recommended. The extension requires crossing the Minapin Glacier, which is heavily crevassed. Locals at the Rakaposhi Base Camp campsite can often guide you across, ask on arrival. Do not attempt the glacier crossing independently without local knowledge.
Don’t skip travel insurance!
I use SafetyWing for most trips – solid coverage for adventure travel.
If you want a guide for the main route, for confidence, company, or local knowledge, they can be arranged directly in Minapin, typically through the Osho Thang Hotel. Hiring locally is significantly cheaper than booking through a tour operator in advance and more flexible.
Rakaposhi Base Camp Trek: Day-by-Day Itinerary
Day 1: Minapin to Hapakun Campsite
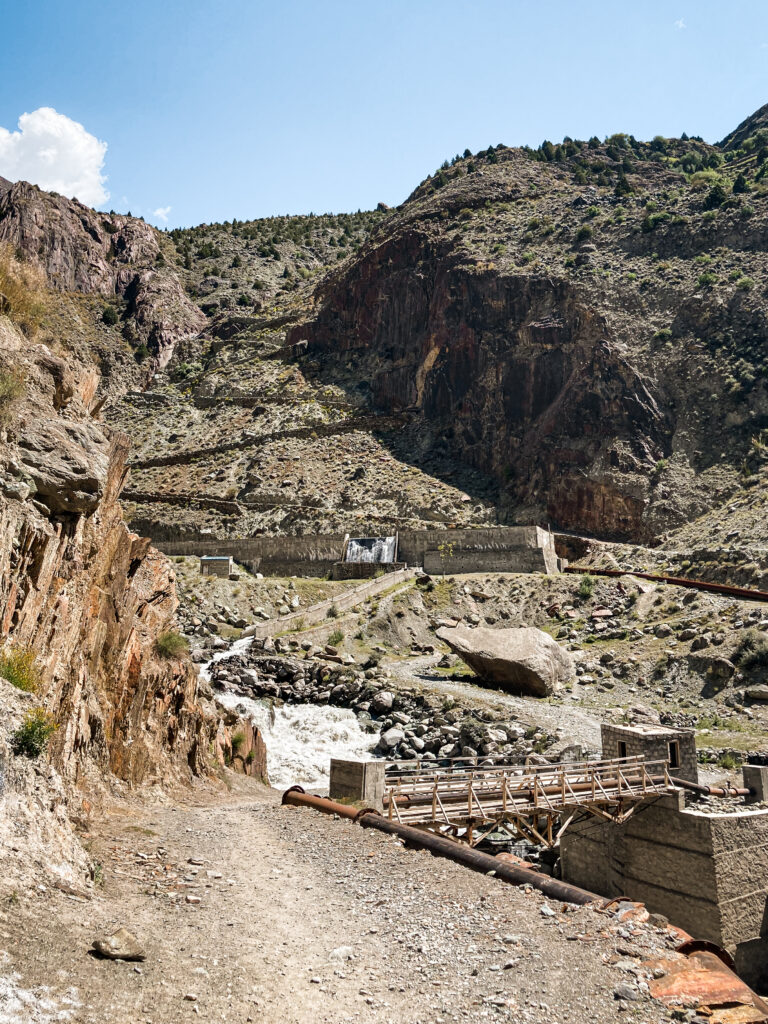
The trail begins at the back of Minapin village, following a canal towards the Minapin River. After around 15 minutes, it crosses a wooden footbridge onto the true left bank of the river and begins climbing steadily into the canyon.
 Beginning of the Trail
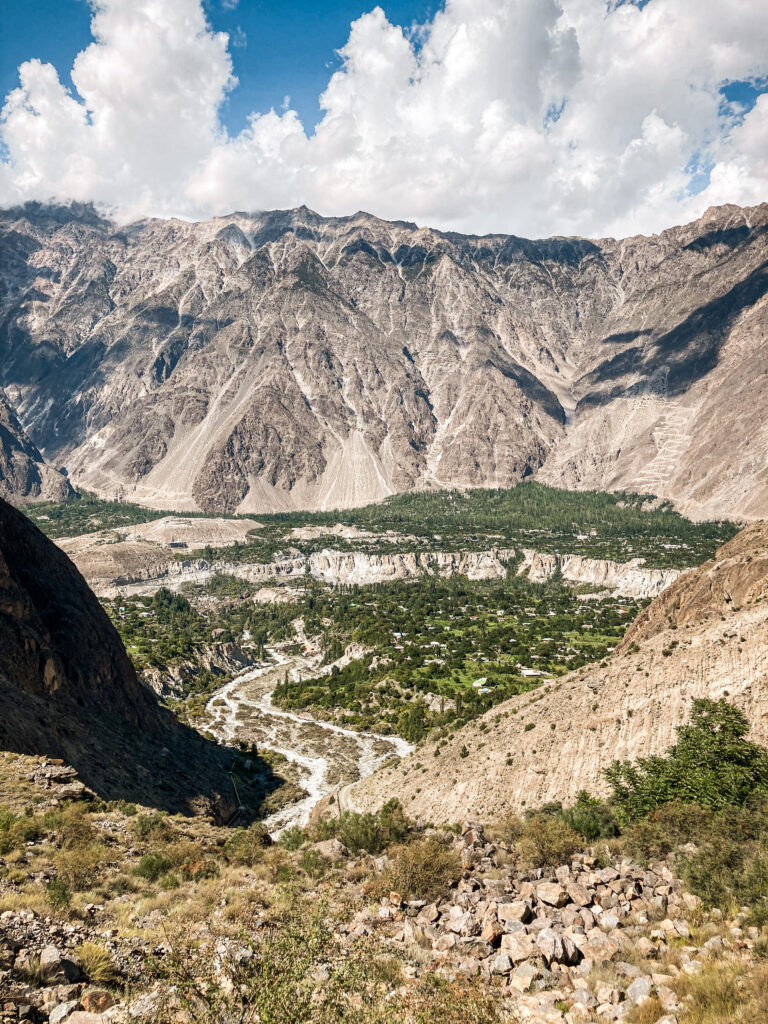 Views over Minapin
The first section passes through walnut and apricot orchards and offers increasingly wide views back down towards the KKH and the Hunza River valley below. As the trail gains height, the orchards give way to pine and juniper forest. Cool, shaded, and fragrant in a way that is familiar from the lower sections of other GB treks.
The path is well-worn and straightforward to follow throughout this section. It climbs consistently but not brutally, long switchbacks rather than steep scrambling. After around 4-5 hours, the forest opens out into the broad, grassy clearing of Hapakun Campsite at approximately 2,850 metres.
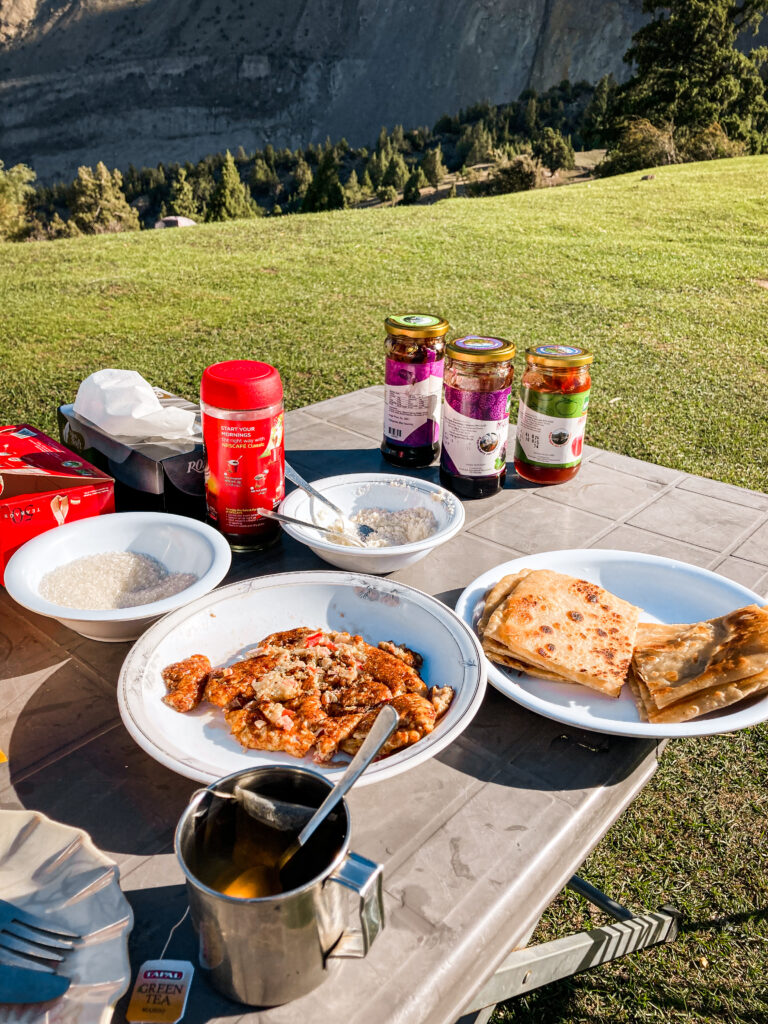
Hapakun is a peaceful, scenic clearing with a small stream for water and a basic shepherd’s hut where local caretakers offer camping gear rental, tent pitching, and simple meals. This is where most trekkers spend their first night.
Accommodation at Hapakun:
The campsite is quiet and the setting: pine trees, mountain air, the sound of the stream, is excellent. The sun drops behind the ridgeline early here; have your dinner sorted before dark and be in your sleeping bag sooner than you think you need to be. Nights at Hapakun are cold even in midsummer.
 Hapakun Campsite
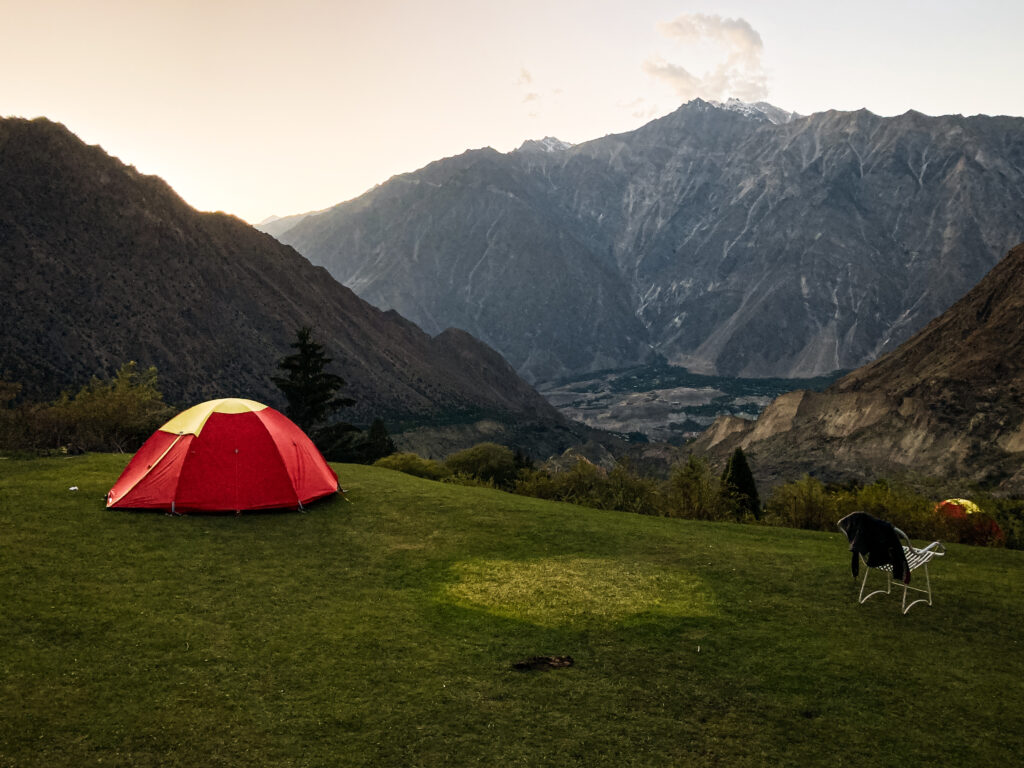 Hapakun Campsite at Sunset
Day 2: Hapakun to Taghafari and Rakaposhi Base Camp
This is the day the trek justifies everything. Start early, before 8am if you can, because cloud builds around Rakaposhi’s summit in the afternoon and the views are best in the morning.
The trail from Hapakun steepens immediately and becomes rockier as you climb out of the forest and into more open alpine terrain. After around an hour, the tree cover thins and the landscape opens into scattered juniper stands and then into the wide, windswept meadow of Taghafari at approximately 3,300 metres.
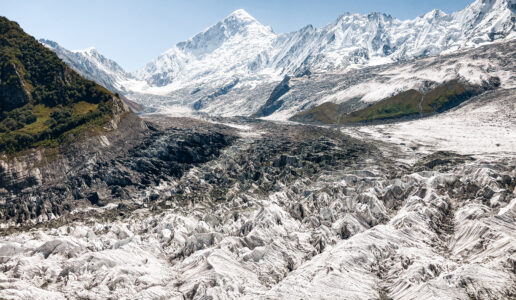
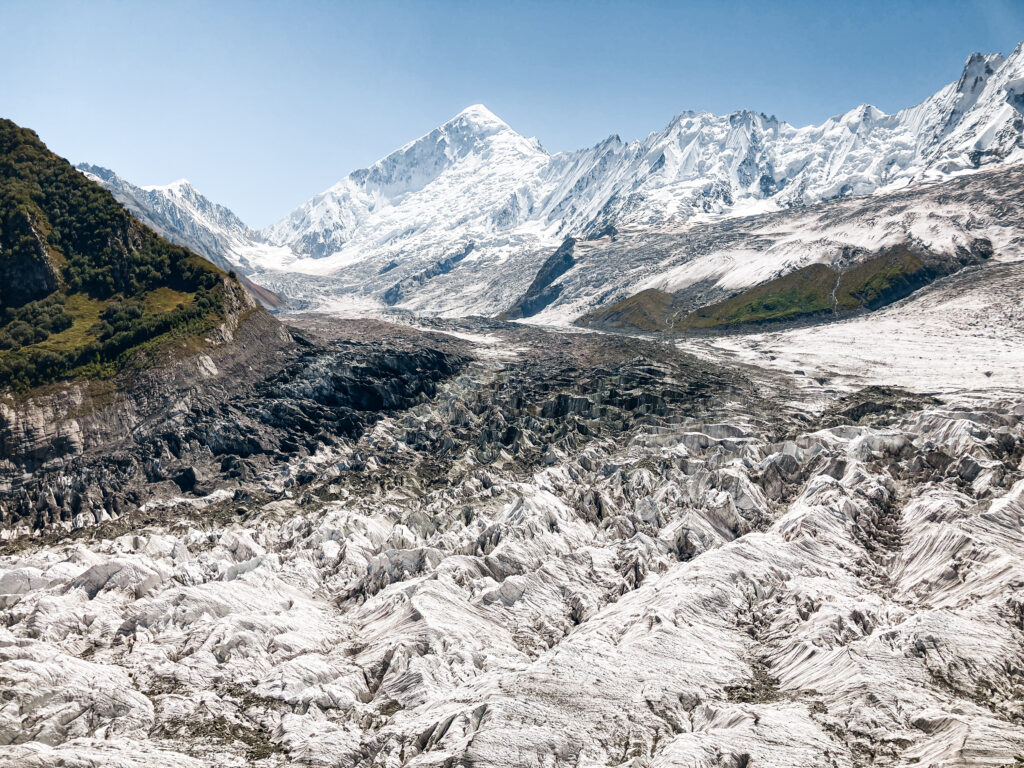
Taghafari is where the trek changes register entirely. The full crest line of Rakaposhi and Diran comes into view for the first time: a wall of ice and rock that occupies most of the horizon. The Minapin Glacier is visible directly below, vast and fractured, its surface dotted with seracs. The scale is difficult to process from photographs; standing in front of it is something different.
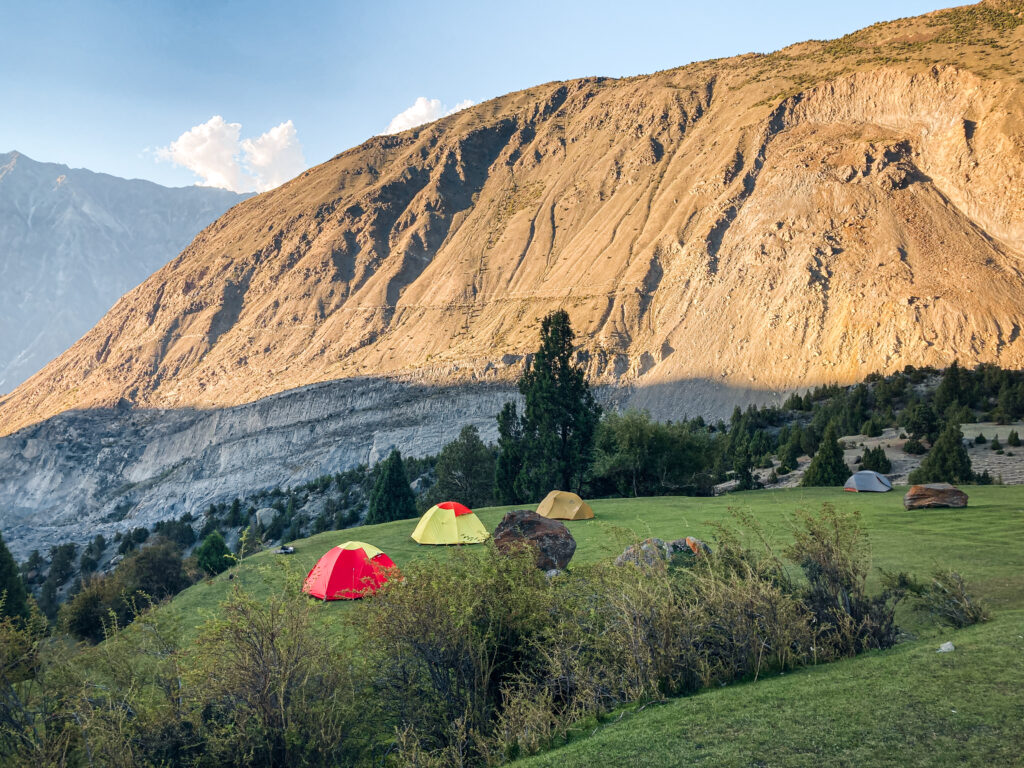
From Taghafari, the trail continues to the Rakaposhi Base Camp at approximately 3,500 metres, around 30-45 minutes further along a well-worn path across the rocky ridge. The base camp sits on a grass plateau with full, unobstructed views of Rakaposhi’s southern face and the glacier. A manned shepherd’s hut here offers basic camping arrangements similar to Hapakun. If you’re spending a second night on the mountain, this is the place to do it.
 Hiking up to the ridge with views of Rakaposhi
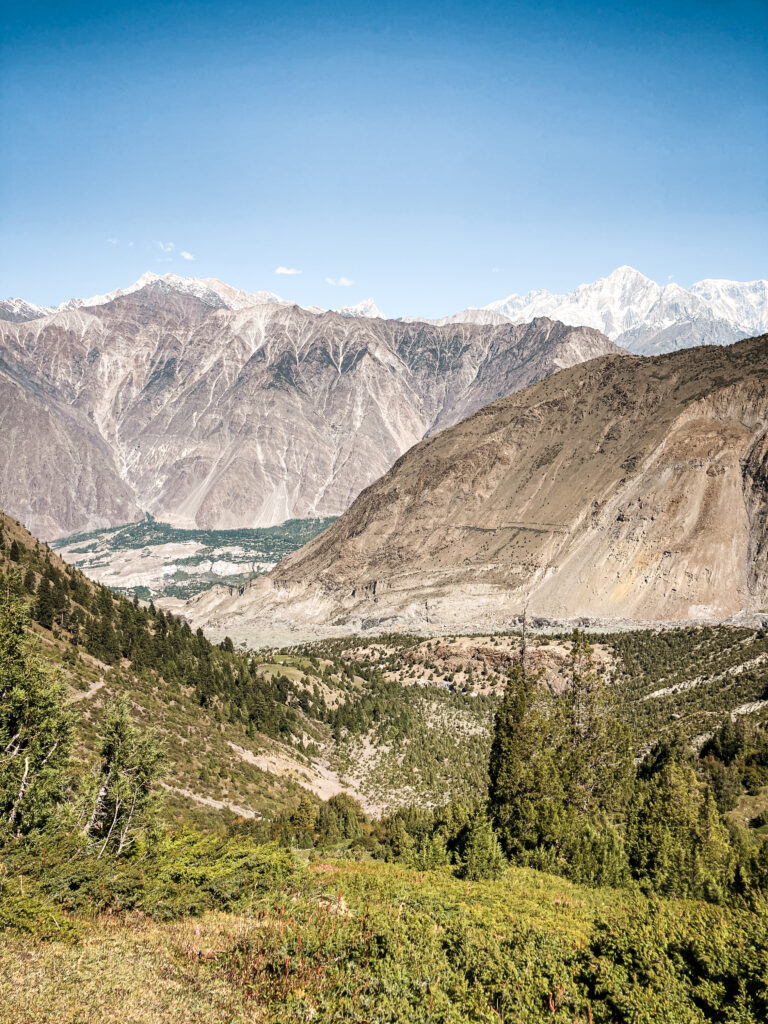 Views of the valley below
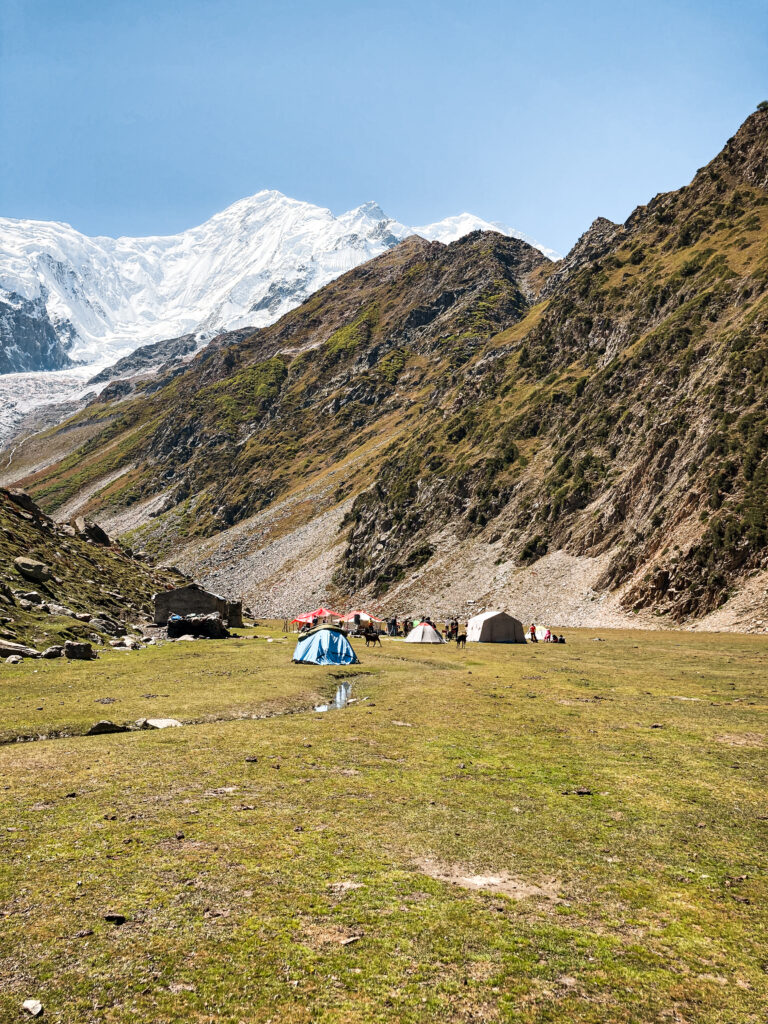 Rakaposhi Base Camp
Give yourself at least two hours at the base camp before turning around. The views of the ice wall shifting in the changing light, and the sound of periodic avalanches rolling down Rakaposhi’s flanks, audible from the base camp, are not things you want to rush.
Day 2 (afternoon) or Day 3: Descent to Minapin
The descent follows the same route back to Minapin. It takes around 3-4 hours coming down: easier on the lungs, harder on the knees. Bring trekking poles if you have them; 1,500 metres of descent on rocky trail is not nothing.
Most trekkers who spent night 1 at Hapakun descend directly to Minapin on day 2 after time at the base camp, completing the full round trip in two days. Those who spent a second night at the base camp descend on the morning of day 3. Either approach works : the two-day version is tight but achievable for confident, fit hikers; three days is more comfortable and leaves room for delays or weather.
The Diran Base Camp Extension (Optional)
From Rakaposhi Base Camp, a further extension leads across the Minapin Glacier to Diran Base Camp on the opposite side, a roughly 4-5 hour round trip from the base camp.
The extension is spectacular: the glacier crossing is an adventure in itself, and the views from Diran Base Camp are completely different to those from the Rakaposhi side. However, the glacier is heavily crevassed in places with drops of up to 30 metres, and this section requires a local guide. Attempting it independently without someone who knows the route is not safe. Arrange a guide at the Rakaposhi Base Camp campsite the evening before. The locals can usually take you across or connect you with someone who can.
What to Pack for the Rakaposhi Base Camp Trek
The trek does not require specialist mountaineering equipment, but the altitude and overnight temperatures demand proper preparation.
There is camping gear (tents and sleeping bags) for rent both at Hapakun and Rakaposhi Base Camp as well as food. I’d recommend you to use these rather than carrying your own gear. But if you wanna be fully independent so you’re able to camp anywhere rather than the campsites, then this is what you’ll need:
Leave behind: Anything you don’t need for two days on the mountain. The Osho Thang Hotel in Minapin will store your main bag while you trek.
How Much Does the Rakaposhi Base Camp Trek Cost?
The Rakaposhi Base Camp trek is one of the most affordable multi-day treks in Pakistan given what it delivers.
| Expense | Cost (PKR) | Cost (approx. EUR) |
|---|---|---|
| Guesthouse in Minapin (per night) | 2,000-3,500 | ~5–8 € |
| Camping at Hapakun (own gear) | 1,000 | ~5 € |
| Tent and sleeping bag rental (per night) | 3,500-5,000 | ~9 € |
| Meals at campsite (per meal) | 500-1000 | ~1.50–2.50 € |
| Public Transport from Hunza to Minapin | 250 | ~1€ |
| Public Transport from Gilgit to Minapin | 300–500 | ~1–1.50 € |
| Total for 2 days / 1 night (no guide, own gear) | ~5,000-7,000 PKR | ~15-22 € |
| Total for 3 days / 2 nights (no guide, renting gear) | ~10,000-14,000 PKR | ~31-43 € |
No permit is required for this trek. The main variable is whether you bring your own camping gear or rent it at the campsite. Renting is more convenient, owning is cheaper if you’re trekking elsewhere in Pakistan too.
Bring all cash you’ll need from Gilgit or Aliabad. There are no ATMs in Minapin or on the trail.
Avoid ATM fees with Wise
The card I use for all my travel withdrawals – real exchange rate, low fees.
Use Revolut to avoid ATM fees
Good alternative to Wise – I carry both as a backup.
Practical Tips for the Rakaposhi Base Camp Trek
Start day 1 early. The climb to Hapakun takes 4-5 hours and you want to arrive with enough daylight to set up camp and eat before dark. Leave Minapin no later than 9am.
Start day 2 even earlier. Cloud builds around Rakaposhi’s summit in the afternoon, often completely obscuring the mountain by midday. Leaving Hapakun at around 8am maximises your chance of clear views at the base camp.
Acclimatise in Karimabad first. Karimabad sits at around 2,400 m. Spending two or three nights there before starting the trek helps significantly with altitude adjustment. Pushing straight from Gilgit (1,500 m) to Hapakun (2,900 m) in one day is doable but you’ll feel it.
Weather can change fast. Even in midsummer, afternoon storms are possible above 3,000 m. If clouds are building and you’re still above Hapakun, start moving down.
The descent is harder on the knees than it looks. 1,500 metres of descent on rocky terrain with a pack is demanding. Trekking poles reduce the impact significantly. Take it slowly on the lower switchbacks.
Bring more warm layers than you think you need. Even in August, nights at Hapakun are cold and nights at the base camp are very cold. The wind on the Taghafari ridge can be brutal at any time of year. A down jacket is not excessive.
Mobile signal is minimal. SCOM fares better than other networks in this region but don’t count on connectivity above Minapin. Download offline maps before you leave Karimabad or Gilgit. For data coverage before getting a local SIM:
Need data before you land? Try Saily eSIM
Use code RITAHE1486 for $5 off your first plan.
FAQ: Rakaposhi Base Camp Trek
Do I need a permit for the Rakaposhi base camp trek?
No. No permit is required for the main trail from Minapin to Rakaposhi Base Camp.
Do I need a guide for the Rakaposhi base camp trek?
Not for the main route, the trail is well-marked and both campsites are manned. For the Diran Base Camp extension across the Minapin Glacier, a local guide is strongly recommended. Arrange one at the base camp campsite.
Can you do Rakaposhi base camp in one day?
Technically yes. The round trip is around 22 km with 1,500 m of ascent and descent, and some fit hikers complete it in 8-10 hours. However, doing it in one day means missing the early morning light at the base camp and puts significant strain on your knees on the descent. Two days with a night at Hapakun is the recommended approach.
How difficult is the Rakaposhi base camp trek?
Moderate. The trail is consistently well-marked and doesn’t require technical skills, but the trail is steep, the elevation gain and altitude (over 3,500 m) mean a baseline of trekking fitness is needed. Prior experience on multi-day hikes helps but isn’t mandatory.
What is the best time of year for the Rakaposhi base camp trek?
June to October, with September being the sweet spot for clear skies, less heat and solitude. July and August offer the most stable conditions. October is the last reliable window before winter snow arrives.
Can I rent camping gear on the trail?
Yes. Both the Hapakun and Rakaposhi Base Camp campsites have tents and sleeping bags available for rent. Meals are also available. This makes the trek feasible without carrying full camping gear from home.
Where does the Rakaposhi base camp trek start?
Minapin village in Nagar Valley, around 1.5 hours from Gilgit and 50 minutes south of Aliabad in Hunza along the Karakoram Highway.
Is Rakaposhi base camp better than Fairy Meadows?
They offer different things. Fairy Meadows gives you Nanga Parbat from a forested meadow and requires a sketchy jeep ride to reach. Rakaposhi Base Camp gives you a closer, more visceral view of the mountain and its glacier, and the trail itself is more rewarding as a trek. If you can only do one, it depends on your priorities. But Rakaposhi is undervisited compared to Fairy Meadows and the solitude reflects that.
Need help planning your Pakistan trip?
Custom itineraries, local guide sourcing, and on-trip support from someone who’s done it.
Final Thoughts
The Rakaposhi Base Camp trek delivers something that surprises most people who do it: a mountain experience that feels genuinely expedition-scale without the permit system, agency fees, or logistical complexity of Pakistan’s more famous routes. You leave a village, you walk a trail, and two days later you’re standing at the foot of a 7,788-metre peak watching ice avalanche off its southern face. No tour required.
More Pakistan Travel Guides
If you’re planning to travel Pakistan independently, these in-depth guides will help you navigate the country, travel on a budget, and explore far beyond the usual routes:
Have questions about trekking in Pakistan? Drop them in the comments. I read every single one.